05. Collating the Signatures
tutorial, beginner, Sewing, signatures, piercing, marking, early stages, preparation 0 Comment
Following on from the previous chapter on folding the sheets, collating is the process of inspecting and ensuring that all the parts of a book are complete and arranged in their proper order. Once this has been verified, the signatures can be sewn together. For blank books, collating plays no role. However, in all other cases, this step is very important. If you mark your signatures properly you can easily get this done.
A short 14 minute video from Lee @ CraftyLoops that will talk you through this entire process. Thank you Lee 🙂
Don't forget to subscribe to our YouTube channel to get access to HD videos of hundreds of Book Binding tutorials and reviews!
Marking the Signatures


This stage involves drawing black marks onto the signatures. The marks would help you in fixing the tape at correct places, and would serve as a guide when you make holes for piercing the thread.
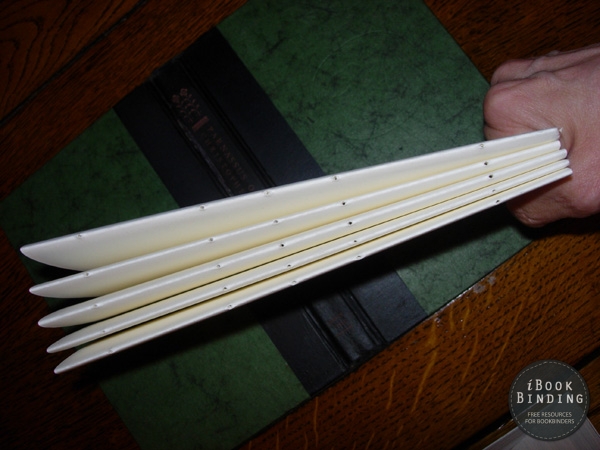
Assemble your signature after you have collated it, and align the edges so that the sheets make a neat pile as depicted in figure 38. Place the signature on a bench, and align it again if the edges seem out of place. With your squared card, even the upper and bottom sides as shown in figure 39, and affirm them in their place with weights. This would prevent the sheets from slipping on top of each other.

Consider your signature thickness and paper size, and evaluate suitable tapes for sticking them together. Choosing appropriate tape width is an important step because it would contribute in providing support to your binding. For instance, if it is only a thin book on which you are working with just a limited number of signatures, you can do with tapes that are quarter of an inch wide. If you are working on a book that is the size of a standard novel, and weighs almost the same, you would have to use 3/8 inches wide tape. On the other hand, if you are binding an extremely heavy and bulky book like an encyclopedia, you would have to use half an inch wide tapes so that the binding can be provided with adequate support. Different book sizes and their appropriate tape widths have been illustrated in figure 40. Remember that tape not only secures the sewn signatures, but also takes their weight. As such, if you cannot determine a suitable width, just use a wider tape because that is a better option than taking a risk and letting your binding suffer unnecessarily.
Suppose that three tapes are required to support your sewn signature. Use your squared card to sketch about eight marks on the back of the signatures. Sketch two marks about half an inch away from upper and lower edges; these will be for the kettlestitches, which secure the sewing thread from one signature to another, and tie all of them in a series of knots that are similar to the structure of a chain.
[support-website]Now determine evenly spaced positions for the three tapes between the two marks. Once you decide this, place two marks for each tape according to their widths across the chosen positions. See figure 41 for details. This sums to a total of 8 marks in all. Please make sure that you place marks are slightly wider than the actual width of the tape so that they do not pucker when you tighten up the sewing as shown in figure 42.


Piercing the Holes


Though you can start sewing the signatures straight away, it is better if you pierce holes prior to doing it so that you can pass the thread through the centre of the folds. Place your piercing board in the press, and turn open the first signature on the centre page. Clip one edge of the sheets so that they do not displace from their positions in the pile. You can even place weights onto the signatures for the same purpose.
Fix your signatures onto the piercing board, and using a thin awl, start piecing holes on the signature. Ensure that the distance between each hole is the same (you can always try making a template with a separate piece of card or paper, see video above for example). While you pierce holes, move from the edge towards the centre of the signature because this direction simplifies the task. The movement has been depicted in figure 43.
Pierce holes in such a manner that the needles would be able to locate them when you start sewing the signatures together. Make sure that all your pierced holes have a smaller diameter than the size of the sewing thread. If this is not so, the thread will not be able to secure the sheets properly, and your binding would become loose. Refer to figure 44 for guidance.
Adjusting the Sewing Frame
The sewing task is made significantly easier if you utilize a sewing frame for it, and fix your signatures onto it before proceeding. Cut about three tapes that are 14 inches in length and place them onto keys as depicted in figure 45. Through each slot in the frame, pass one of these tapes and then fix their ends onto the cross bar. This is demonstrated in figure 46. The length of tapes can be more than 14 inches, but not less, if you want plenty of space between the platform and the crossbar. Obviously more space makes the task simpler. If your tapes are of shorter length, the cross bar will be placed at a lower position and can hinder with your visibility. Once you attach the tapes onto the crossbar, tighten it up so that the tapes do not loosen up. See figure 47 for details.


Now place your signature on the frame, move the tapes in either direction and align them with the marks on your signatures. The tapes should form a 90 degree angle with the platform; if you are unsure of this, use a square and adjust the position of the tapes until the angle measurement is accurate. Tighten the crossbar once again, and ensure that the tapes are firm.
Please Support us on Patreon!
![]() The minimum level of contribution is only $1 per month.
The minimum level of contribution is only $1 per month.
Moreover, starting with the pledge level of $3, you will get a digitized vintage book about bookbinding, book history, or book arts each month from us!
These pledges help iBookBinding to continue its work and bring more information about bookbinding and book arts to you!
