Making a Phase Box in 5 Minutes
video, tutorial, tutorials, boxes, conservation, box making, archives, libraries, drop-back boxes, phase boxes 0 Comment
The first time I learned about phase boxes, I was on a tour of The Leeds Library. It was conducted by their bookbinder, Brian Cole, who ventured up from the depths of the library basement to show us around.
We were in the special collections rooms, and he had some interesting binding set aside for us. I remember the first edition copy of Casino Royale in particular—it had a custom clamshell box with mock bullet holes in the lid. Very fun.
My tour group, however, became interested in another box entirely. It was made of plain blue card, and it wasn’t much to look at. It was a phase box: a quick, simple, and versatile box, perfect for your conservation needs. Especially when the library you work for has been collecting books since 1768.


Phased Conservation
Phased conservation is a concept that originated with the Library of Congress in the 1970s. It’s all about long time frames, careful planning, and non-invasive treatment. In one conservationist’s eloquent words, it ‘defines preservation as the art and science of delaying the inevitable.’
That is the essence of why we put books in boxes—to protect them from the environment and shelf wear, in order to prolong their life.
The European Law collection at the Library of Congress is the reason phase boxes were developed. The books were in such a state of decay that you could sweep up fragments from the floor every morning. Boxing the books allowed the conservators to make notes and estimates for future treatments, and to move on to other parts of the collection in the meantime.
The phased boxes, as they were then referred to, weren’t really boxes per se, but instead more like wrapper cases based on traditional Japanese and Chinese designs. They were only used on dormant, rare, and fragile items.
The concept has come a long way since then.
The phase box design Brian Cole showed us was developed at Uppsala University in Sweden and is known as a 5-minute phase box. The name is also a challenge—the record two decades ago was 4.53 minutes. I’m sure someone has surpassed that by now, and I know I need a lot more practice before I have a chance.
The ability to produce so many boxes so quickly—maybe 50 to 60 per person per day—means that you can theoretically box up more than just dormant and fragile items. In fact, putting more of a collection into boxes can allow conservators to identify what items are most frequently handled. They can evaluate what sort of wear and tear is inflicted on an item through daily use, all while letting the packaging take the brunt of the damage.
Once I knew what I was looking for, it was easy to spot the phase boxes on the shelves of The Leeds Library. As the only bookbinder in a library with a very large collection, it was easy to understand Brian’s enthusiasm for the 5-minute phase box.
The response from my tour group was equally enthusiastic, and Brian visited us in Newcastle a few months later to teach a phase box workshop.
I missed it.
Luckily for me, Uppsala University has a Youtube channel and an excellent two-part tutorial on their 5-minute phase box.
As a general sort of disclaimer, this was a casual exercise. I didn’t use any kind of archival board to make my boxes. The tutorial recommends archival corrugated board. I didn’t have that in my stash of supplies, and I wasn’t in the mood to go out and buy anything.
I used a Cheerios box I fished out of the recycle bin.


One of the books I boxed up isn’t even a book—it’s a couple of scraps of foam core glued together.
Really, this was more about trying out the tutorial and getting a feel for the process. Scraps and cereal boxes are good for that sort of thing.
Uppsala’s tutorial video demonstrates two types of phase boxes. The first is a drop-back or clamshell style of box, designed to house more valuable material. The second is the true 5-minute phase box, based on a four-flap wrapper design.
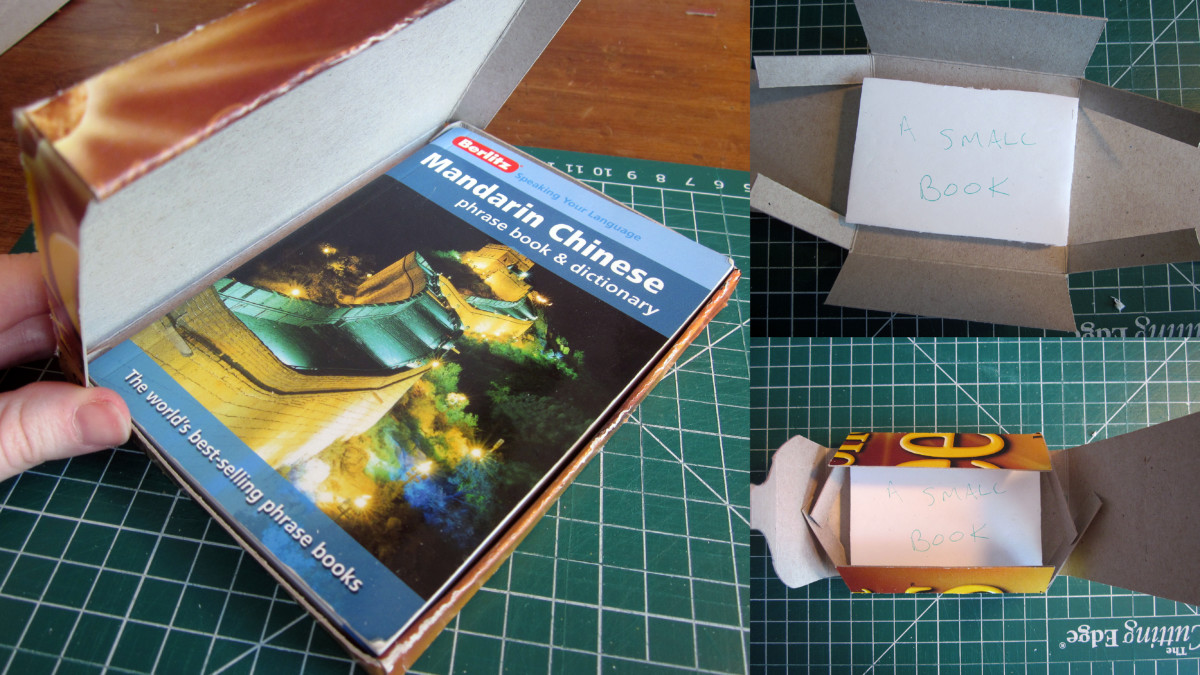
5-Minute Phase Box
I’ve made double-walled clamshell boxes for fine bindings in the past. As long as you have a board cutter at your disposal, you can finish it in a day or two, depending on how long it takes for your glue to dry. It’s not really my idea of a good time, so I was impressed with the box they folded together in less than 10 minutes. These boxes are utilitarian by nature, but quite sleek when they’re all lined up next to each other.


Mine was not sleek, thanks to the obnoxious graphics on my board, and it took me something like 30 minutes to make. That said, I made a wrong cut on my first attempt, and managed to rig up a second attempt without referencing the video tutorial at all. If you asked me to put one together right now, I could do it quite confidently. That speaks well of both the design of the box and the quality of the tutorial.
Watch out when you measure the height of your book onto your template, though—I think they missed a step! You need to the thickness of your book measured out on either side, both top and bottom so that you can fold the whole thing up into a tray. The only comment on the tutorial points out this error.


Drop-Back Box
The drop-back box does require a bit of adhesive to get the job done, and for this reason, I find myself leaning towards the 5-minute phase box as my favorite of the two. It’s so straight forward and simple, I can’t help but appreciate its elegance.


It took me about 10 minutes to construct, right along with the tutorial. The tab closure eliminates the need for ties or adhesives, which for me defeat the purpose of making the housing quickly. And as long as I make the next one out of anything but a Cheerios box, not only will I be quicker but it’ll look better too.

There are many other designs for phase boxes around, but these two by Uppsala are a great place to start. You’ll be able to make a quick and simple housing, and you’ll be able to build on those skills to make more complicated boxes in the future. Why not give it a try? Just make sure you time yourself.
Don’t forget to check our collection of box making tutorials as well!
Please Support us on Patreon!
![]() The minimum level of contribution is only $1 per month.
The minimum level of contribution is only $1 per month.
Moreover, starting with the pledge level of $3, you will get a digitized vintage book about bookbinding, book history, or book arts each month from us!
These pledges help iBookBinding to continue its work and bring more information about bookbinding and book arts to you!
