Lacunose: Painting with Leather and Making Clouds
bookbinding, American Academy of Bookbinding, book covers, lacunose, cover design, sanding, Paul Delrue, Coleen Curry 0 Comment
Bookbinding involves a lot of precision craftsmanship. Making a lasting object that can open and close out of paper, leather, cord, and an adhesive isn’t a simple task. The nitty-gritty of book mechanics is a lifetime of study and practice.
And for all that, the average person off the street is still going to judge your binding by its cover.
Design is what enchants the eye. If I’m going to be honest, it’s also the part of bookbinding that I enjoy the most. So let’s leave forwarding alone today, and instead, talk about decorative techniques. Specifically, let’s talk about lacunose.
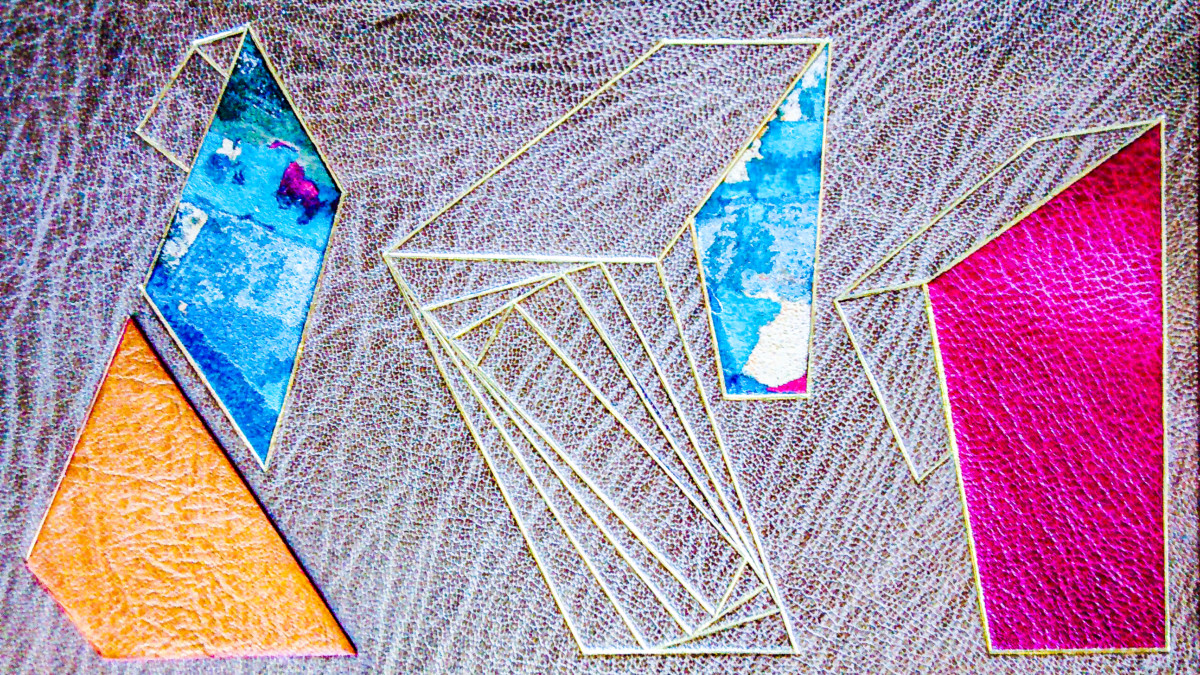
Lacunose
The word derives from the Latin word ‘lacunosus,’ meaning ‘with holes.’ It’s usually associated with certain types of cloud formations, which is appropriate because the effect lacunose produces on books is positively dreamy. Some people describe lacunose as “painting with leather.”
The holes referred to in the name are the tiny pits in the surface of the leather that form as you sand it. The technique was developed by Paul Delrue, who has been making lacunose bindings since the 1970s and has generously shared his methods with fellow binders.
When I first started binding in leather, my knowledge of decorative techniques was somewhat limited. I knew how to impress textures and lines into damp leather. I could include a depressed or raised area under the leather. You can make some pretty cool stuff with just those few skills, and I’m sure if I stuck with them and pushed them to the limit, I could design some pretty outstanding bindings.
I am much too fickle for that sort of concentrated work.


On a recent course at the American Academy of Bookbinding, I had the chance to view and handle some fine bindings that used lacunose as a decorative technique. Coleen Curry, who was assisting with the class instruction, spoke about the use of lacunose in her own work. And if you’ve never seen any of her bindings before, I highly recommend you check them out. She also recently won one of this year’s Prizes during the Society of Bookbinders Internation Competition—J Hewit & Sons Award for Excellence in Design. You can find the award-winning book in this post.
Lacunose seemed simple enough to do, so I downloaded Paul Delrue’s instructions (you can download them here) and got to work.
Fair warning, lacunose involves a lot of sanding. Sanding is my most loathed part of bookbinding, but if you like it, then maybe lacunose is for you!
Materials
Step one is to gather your materials. The first time I tried this, I used leather scraps from the Scharf-fix bucket. The second time I tried it, I used paper scraps. The important thing is that they’re not too thick, because as I mentioned above, you’re going to be doing a lot of sanding.


If you’re using scraps, try a leather like Harmatan, where the dye goes all the way through the skin. It can produce some magnificent results as you sand.
For an adhesive, you can use a PVA mix1 or watered down PVA. If you have a bucket in your sink that you use to clean your PVA containers, the contents of that bucket will probably do the job.
Finally, you’ll need something to glue everything to. You can use a heavy paper or card stock, or if you have green binders’ board from Conservation by Design, that works well too. It will stand up to your sanding, and when you’re done you can peel away the top layer from the board and end up with a thin lacunose panel.
Preparing Your Panel
Glue down your scraps. How you do this is really up to you. You can cut the pieces up with pinking shears or tear them (as I did with the paper lacunose), or you can leave them in strips (as I did with the leather). This is one area where you can experiment and have fun.


Overlap the pieces and build up some layers, but don’t go too over the top—there’s no need to make the sanding more difficult than it has to be!
Once you’re happy, dry the panel in a press or under weight.
Sanding
Once the adhesive is dry, sand like your life depends on it. On both panels, I started with an 80 grit sandpaper and worked my up to 120.


Although I find sanding interminable, it’s fun to see the colors of buried layers start to peek through. If you’re not quite liking how things are turning out, or you sand off something you shouldn’t have, you can glue on more layers and go from there. In fact, with lacunose, you can expect that you’ll go through the gluing and sanding process multiple times before you produce something you like.
If the pieces you’re sanding become thin and start lifting away, you can brush the whole panel with watered down PVA and then dry again under weight.
Finishing Your Panel
Once the panel is to your liking, finish it off with some 360 grit sandpaper. From there you can leave it as is, or if you like your leather to have a sheen to it, pop it between boards and put it in the press.


After all that, it’s time to get decorating! You can use your panel as a whole, or cut out pieces to use as inlays or onlays. You can tool onto it as well.
I used my leather lacunose panel to experiment with onlays in a gold tooling class, to spectacular effect. One of my fellow students compared the effect to watercolor. The texture is fantastic—you can’t help but touch it.


I can only imagine how beautiful an entire book covered in lacunose would be. If you’re game, the Paul Delrue’s instructions detail how to cover a full book in lacunose, by sanding leather that’s glued directly onto the book.
I might even be willing to put up with the amount of sanding that would involve because I know the results would be worth it. Give lacunose a try and you’ll see what I mean.
Please Support us on Patreon!
![]() The minimum level of contribution is only $1 per month.
The minimum level of contribution is only $1 per month.
Moreover, starting with the pledge level of $3, you will get a digitized vintage book about bookbinding, book history, or book arts each month from us!
These pledges help iBookBinding to continue its work and bring more information about bookbinding and book arts to you!
