Recent Updates to My Bookbinding Workbench
I had these workbenches almost since the moment I started to run bookbinding classes at my studio back in Moscow. As this location served both as woodworking and bookbinding workshop, I had all means to make them on my own.
Since that first moment, they have passed through lots of minor and significant changes. Two of them I gave away right before we moved to the Netherlands at the very beginning of this year. But the other two came here with me. And, oh, boy, they are soooo heavy! It was a hard task to bring them up the steep Dutch staircases to our third floor!
I’ve seen a recent discussion on Facebook about what’s better for a bookbinder, to have a separate studio, or to work from home. As usual, the answer is: it depends.
Initially, I wanted to have a separate workshop. But in the first three months of our expat life, I still hadn’t figured out a place for my work. So I decided to stop punishing myself for that failure and to move on with other projects.
But that doesn’t mean I don’t use both of the workbenches I brought here from Moscow! They found their place in our living room. Luckily, that’s a quite large living room, so they are not in the way in any possible sense. I had to work with my drilling press a couple of days ago, and my lovely wife didn’t even notice that while watching a TV show. No, the living room is not that big, of course. But there is some space here.
Initially, I’ve got the idea on how to make the workbenches at the time I’ve been studying at the American Academy of Bookbinding. There were these large sturdy workbenches with nice shelves made by a local woodworker.
As I wasn’t as experienced in making tables (I’ve made exactly zero tables before that), my structures were a bit simpler. However, they are functional enough, and I’m happy with them. Two of the workbenches I left in Moscow were used not only for bookbinding. One of them had an integrated router, and another – a table saw.
The other two, however, were just tables.
Vacuum Cleaner
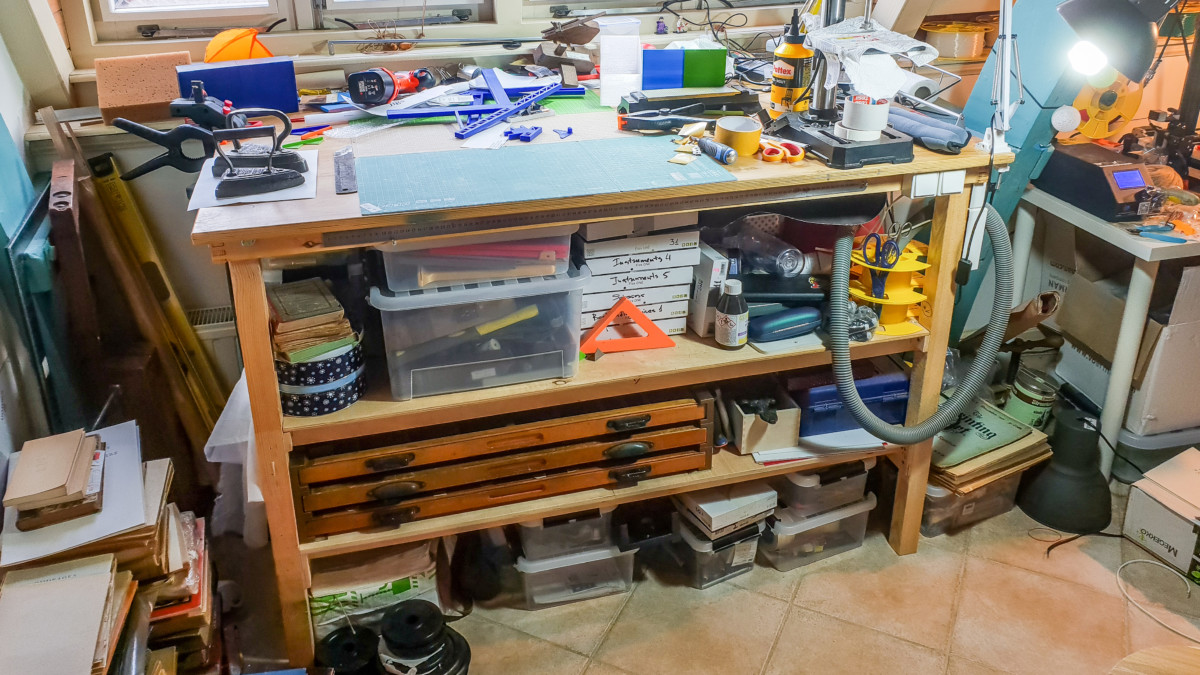
First thing decided to change this autumn, was to put a vacuum cleaner in the table. Yes, it takes some space on one of the shelves. But that’s what I have taken out from woodworking: when you have a lot of small waste, it is good to have a vacuum cleaner on hand.
And you know what? That’s the best improvement I made since the very beginning!
Even if I was using this workbench only for bookbinding, there always is enough small waste. But I use this table for small woodworking projects, and I do finishing of all my 3d-printed tools and jigs here as well.
Switches and Power Plugs
That’s another thing I borrowed from woodworking. As the vacuum cleaner was somewhere in the back of the middle shelf, it wasn’t easy to switch it on. So I powered it through a plug I installed on the table’s leg. Now I can turn it on with a switch located right below the working surface.
Three other plugs and the second switch are planned for the lights. However, I do not use them yet. I still have to install an overhead lamp.
Type Cases
I bought my first two type cases on the IJ-Hallen flea market in Amsterdam. That’s a huge monthly event. Some sellers ask unreasonable amounts of money for their wares, but sometimes you may find nice things there. One of the cases cost me 10 euro, and the other was 20 euro. And any of them with a price below 15 Euro is considered cheap.
Then, just a month ago, I found the third case with handles similar to the one of the first two. What’s even better, the seller asked only two euro for it! Isn’t that amazing?
As my 3d-printer allows to make objects no longer than 40 cm, I had to assemble the guides from separate parts. I also made the levels stackable. Not there is a place for three type cases, but in the future, I may decide to add some more.
As you may have seen, I use these cars for storing some of my smaller 3d-printed bookbinding jigs and tools. For some time I planned to make a proper stand for them. Initially, it should have been made of wood. But then I thought that designing a model and printing the guides would be easier and faster.
So, that’s how these three type cases are placed now.
Maybe you’ll find some of these upgrades useful. Or you may have implemented something similar in your workshop already. If you have any thoughts on the matter, please share them in the comments section below!
Please Support us on Patreon!

Moreover, starting with the pledge level of $3, you will get a digitized vintage book about bookbinding, book history, or book arts each month from us!
These pledges help iBookBinding to continue its work and bring more information about bookbinding and book arts to you!


