
3D-Printed Spine Rounding Tool
tutorial, bookbinding, book binding, instructional 0 Comment
Spine rounding tools are used to… round spines of covers when one is making case bound books. Alternatively, they may be used to form a rounded spine of a book block.
In the first case you place the spine of the cover in that groove and work it with something like a pestle until it is properly rounded. First, this allows to make a perfectly round spine. Second, it protects from braking or wrinkling the spine. You may start with a larger radius and steadily reach the needed radius with different groves to be even more careful.
While forming a book block, you have to put the sewn – but not yet glued book block – into the groove, gently form it and carefully take it out for gluing. I have never tried to do that – I’ve always rounded my books by hand and in a press. But I know bookbinders who use that method.


Anyway, until recent weeks I’ve been making quite a lot of wooden rounding tools. I understand that in German this tool is even called Rundeholz – literally, round wood. I plan to continue making them – it is a pleasure both to do something with wood or to use wooden tools. However, there are several downsides to that choice of material:
- Wood itself is much more expensive than plastic;
- Woodworking is a much more expensive process than 3d-printing;
- Weight of the tool is higher. Hence, shipping is several-fold more expensive.
The other advantage of a 3d-printed tool is its bespoke nature. You are limited with sizes of the printing plate only (and that could be solved too). With corner cutting tools I offer any sizes from 1 mm to ¼” for the same price, because it is pretty easy to change the design and production costs are not so different. Here customers can decide what exactly groove sizes and profiles they would like to get. Should it be half-circular 12 mm in diameter? That’s fine! Would you like to get half-oval 50 mm in diameter? Ok, easy!


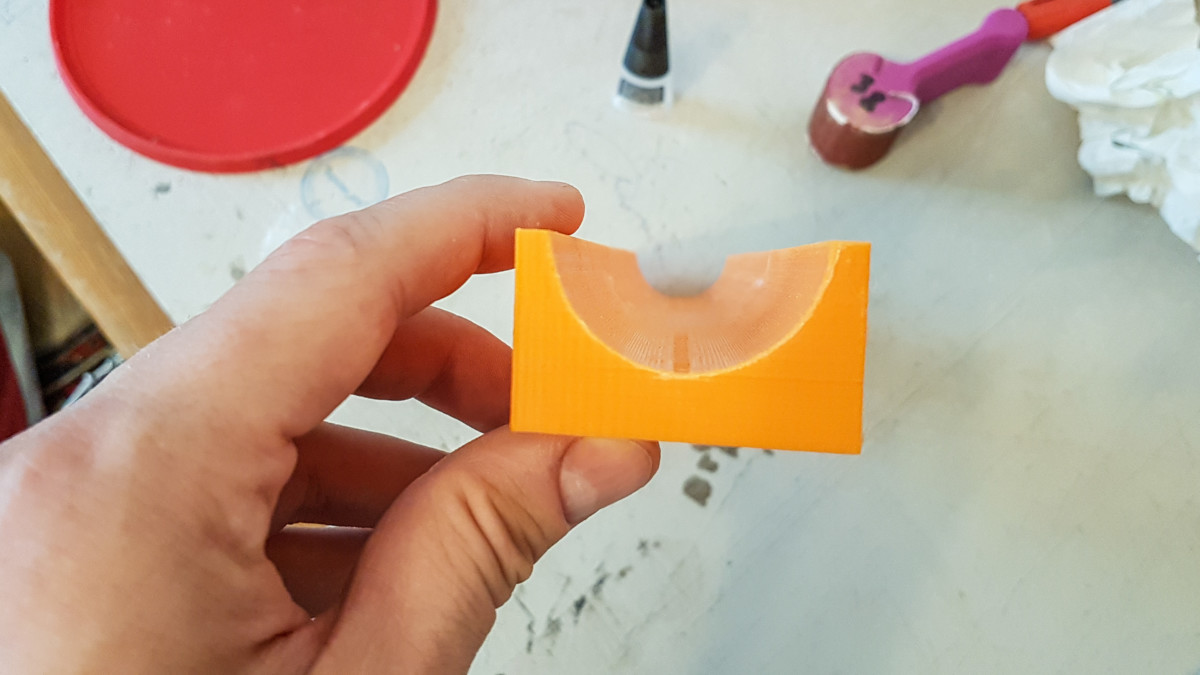
The orange one was the firs I’ve printed.
I’ve also sanded them a bit, the same as I do with wooden rounding tools. You can see here, from left to right: groove with sanding finished; sanding in process; and not sanded at all.


By the way, here are the results of my latest stage of the experiment – jointed rounding tool. It is made with three pieces glued together (two are the same for the outsides). You can make this tool as long as you wish – length of each element is 12 cm, which gives 32-cm-long tool in this case.


Looks pretty straight and smooth!
The only thing I still haven’t decided is the design of pestles used along with the rounding tool. During my recent experiments I’ve made these funny sanding tools, to have an easy solution to finishing the surface of the grooves of these rounding tools. However, now I think they may be easily used instead of standard pestles while rounding a spine. I should test that out with my next binding!
Tools are already available at my Etsy store:
- One-sided tools:
- 3×5 cm rounding tool (one groove)
- 3×15 cm rounding tool (up to 3 grooves)
- 3×20 cm rounding tool (up to 4 grooves)
- Multi-sided tools:
- four-sided 5×5 cm rounding tool (up to 4 grooves)
- two-sided 5×20 cm rounding tool (up to 7 grooves)
Do you have any comments or suggestions on the matter? Please share them below!
Please Support us on Patreon!
![]() The minimum level of contribution is only $1 per month.
The minimum level of contribution is only $1 per month.
Moreover, starting with the pledge level of $3, you will get a digitized vintage book about bookbinding, book history, or book arts each month from us!
These pledges help iBookBinding to continue its work and bring more information about bookbinding and book arts to you!
